Have you ever wondered how you can get the sign with the perfect lettering without having to use stencils? We have asked the community of crafting on the Facebook page and we get some great tips for stencils for wood. In this article, we will tell you all about it. So, if you are looking for the answer to this kind of problem, we might have the perfect tips for you.
How to Paint Letters on Wood
What is the best way to put letters onto wood? Well, if you want to make a sign you need to use stencils for wood and you might not know how to make one. Well, you might be able to print it on paper and then you can trace it onto the wood, and then you can paint the lines. This is if you are going for cheap ideas. You also can make a stencil from freezer paper, it’s very easy and inexpensive.
You can draw it on the paper, and then you can put the paper on the wood and you can use a ballpoint pen to help you trace it down. You need to press it down hard and it will make the guidelines for you in the wood for you to paint.
Easy Tutorial in Making Stencils for Wood

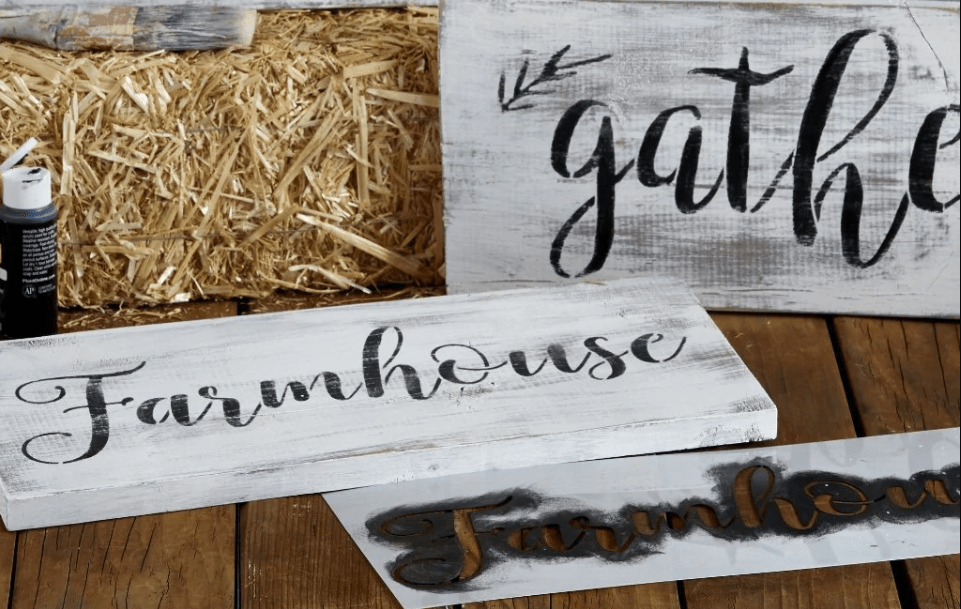
Today we will give you an easy and simple tutorial. We will be going to let you know how to make these beautiful wooden signs and we promise it will be really easy for you to do at your house. It won’t take too long of your time and also the cost of this idea is pretty much nothing, it’s cheap and super easy to follow. But, before you make it, you need to prepare all the items below.
- Salvaged wood (a piece)
- Hammer
- Upholstery tacks or also short nails (this is optional)
- Black acrylic paint (or you can use other colors to fill in the letters)
- Acrylic paint (for background color)
- Large paint brush
- Inkjet printer
- Small paint brush
- Sharpie marker or another dull and rounded tool
- Twine
This project will start with a pile of cedar fences that you might have sitting in your backyard for ages. You can put a portion of them into a chimney to get a grey weathered. Then you can be sanding the wood, but do it softly or you can just wipe them off, to help you remove any of the dirt from the wood and other loose particles.
The next step is you need to distress the wood to your liking. You can hammer a few upholstery tacks into the corners, and then you can add a couple of empty nail holes, then you can bang on it with the claw of the hammer.
Next, you can choose the paint that you want to use. For your information, for this kind of project you need to less the sheen, the paint has, then it will be better. The acrylic craft paint will work best for this kind of project. Don’t bother with spray paint, it will make the letter transfer don’t end well.
After you properly dented and also nicked the piece of wood that you have to perfection and you added some tacks or nails. You need to take your large and dry paintbrush and then get a little paint on it. You can wipe off any excess on the lip of the paint and also you can sweep your paint lightly over the piece of wood.
Once you were happy with the paint, then you can put the wood aside and try to dry them, and then you can head to your computer. You can choose a word and then a font that you want to add to your sign and then you can enlarge it to a perfect size that will fit on the piece of wood that you have. Don’t forget to flip it so It will backward and then print it. This is a very easy and simple way to make stencils for wood.
You can use Adobe Photoshop to print the letter backward and you can use the rotate canvas feature under the image, and then you can click on the flip horizontal before making stencils for wood. After you finish with your letters on the computer, you can go back to your wood, and then you can rinse the paintbrush that you just used before. Then you can turn your piece of paper over so that the ink will face down on the wood. Position it in the center and then you can begin to brush the paper with your wet paintbrush.
You don’t want to make your paper sopping wet with the ink, that’s why you need to wet it enough so that it will seep through the other side of the paper and starts to release the ink from the paper. Now you can take your sharpie lid and then you can begin to burnish the letters horizontally and vertically. In this step, you want to transfer as much ink from the paper as you can. Just scribble over each letter and make sure you have burnished every bit of each of the letters.
When you are done, you could leave the wood and keep it for a few minutes. After that, you can go back with your small paint brush, and then you can fill in the letters little by little with a very diluted black paint. Once you finished with the word, you can distress the sign and have a little more with some sandpaper, it will help you take off some of the paint along the edges and it will also be swiping over the word. This will make the stencils for wood and the letters look more aged and authentic.
That’s how you can make the stencils for wood in a very simple and easy way. You can do this on your own and it will cost you almost nothing. It’s simple and easy to do. You can try it on your own and make the perfect letter sign for your house.
