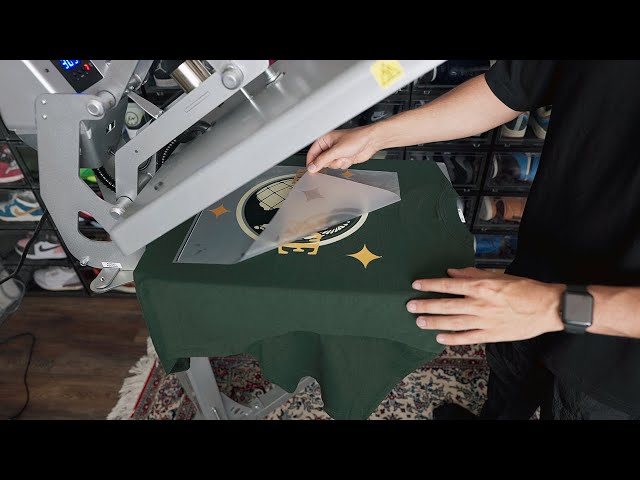
Heat pressing is a method of transferring a design onto a shirt using heat and pressure. The process involves placing a transfer sheet with the desired design onto the shirt and then applying heat and pressure for a specific amount of time. The heat and pressure cause the ink on the transfer sheet to adhere to the shirt, creating a permanent design.
The amount of time required to heat press a shirt depends on several factors, including the type of transfer paper being used, the type of fabric being pressed, and the desired level of adhesion. In general, however, most heat pressing jobs will require a pressing time of between 15 and 30 seconds. It is important to follow the manufacturer’s instructions for the specific transfer paper and fabric being used to ensure the best results.
Heat pressing is a relatively simple and inexpensive way to create custom shirts, and it can be used to create a wide variety of designs. With a little practice, anyone can learn to heat press shirts like a pro.
Contents
how long to heat press a shirt
Determining the optimal heat pressing time for a shirt is crucial to ensure a successful transfer. Several key aspects influence this duration, including:
- Transfer paper type: Different types of transfer paper require varying heat pressing times.
- Fabric type: The thickness and composition of the fabric affect heat transfer efficiency.
- Desired level of adhesion: The intended durability of the transfer influences the pressing time.
- Heat press temperature: Higher temperatures generally require shorter pressing times.
- Pressure applied: Adequate pressure ensures proper ink transfer.
- Shirt color: Darker shirts may require longer pressing times to achieve sufficient opacity.
- Transfer size: Larger transfers typically require longer pressing times.
- Ink coverage: Heavier ink coverage may necessitate extended pressing.
- Press condition: A well-maintained heat press ensures accurate temperature and pressure.
- Environmental factors: Humidity and altitude can affect heat transfer.
Understanding these aspects allows for precise heat pressing time determination. For instance, a light-colored shirt with a small, single-color transfer on standard transfer paper would require a shorter pressing time compared to a dark-colored shirt with a large, multi-color transfer on specialty paper. By considering these factors, optimal adhesion and transfer quality can be achieved, ensuring the longevity and vibrancy of the design on the shirt.
Tips for Determining “How Long to Heat Press a Shirt”
To achieve optimal results when heat pressing a shirt, consider the following tips:
1. Refer to Manufacturer’s Instructions:
Always consult the manufacturer’s guidelines for the specific transfer paper and fabric combination being used. These instructions provide precise temperature and time recommendations to ensure proper adhesion.
2. Test on Scrap Fabric:
Before applying heat to the actual garment, test the transfer process on a scrap piece of similar fabric. This allows for adjustments to temperature and time settings to achieve the desired results without risking damage to the actual shirt.
3. Use a Quality Heat Press:
Invest in a reliable heat press that maintains consistent temperature and pressure throughout the pressing process. A well-maintained press ensures accurate heat transfer and minimizes the risk of uneven or incomplete adhesion.
4. Apply Even Pressure:
During the pressing process, apply firm, even pressure across the entire transfer area. This ensures that all parts of the design receive the necessary heat and pressure for proper adhesion.
5. Consider Fabric Thickness:
Adjust the pressing time and temperature based on the thickness of the fabric. Thicker fabrics require longer pressing times and higher temperatures to ensure the heat penetrates effectively.
6. Use a Teflon Sheet:
Place a Teflon sheet or parchment paper over the transfer paper before pressing. This prevents the transfer paper from sticking to the heat platen and ensures clean, precise transfers.
7. Allow for Cooling Time:
After pressing, allow the shirt to cool completely before handling or peeling away the transfer paper. This cooling period helps the ink set properly and prevents smudging or damage to the design.
Summary:
By following these tips and carefully considering the factors that influence pressing time, you can achieve professional-quality heat transfers on your shirts. Remember to always test on scrap fabric first and refer to the manufacturer’s instructions for specific recommendations.
With practice and attention to detail, you can master the art of heat pressing and create stunning custom shirts that will last.
FAQs on Determining “How Long to Heat Press a Shirt”
To enhance your understanding of the heat pressing process, here are answers to frequently asked questions:
Question 1: How do I determine the optimal heat pressing time for my project?
Refer to the manufacturer’s guidelines for the specific transfer paper and fabric combination. Consider factors like transfer size, ink coverage, fabric thickness, and desired adhesion level. Testing on scrap fabric is recommended to fine-tune the settings.
Question 2: What are the consequences of incorrect pressing time?
Underpressing can result in poor adhesion, peeling, or fading of the transfer. Overpressing can scorch or damage the fabric, especially on delicate materials. Accurate pressing time is crucial for a durable and visually appealing result.
Question 3: How do I adjust pressing time for different fabric types?
Thicker fabrics require longer pressing times and higher temperatures to ensure the heat penetrates effectively. Conversely, thin and delicate fabrics may require shorter pressing times and lower temperatures to prevent damage.
Question 4: Can I reuse transfer paper after heat pressing?
Generally, transfer paper is not reusable. Once the ink has been transferred to the shirt, the paper will no longer contain any usable ink.
Question 5: What is the recommended cooling time after heat pressing?
Allow the shirt to cool completely before handling or peeling away the transfer paper. This cooling period helps the ink set properly and prevents smudging or damage to the design.
Question 6: How can I troubleshoot common heat pressing problems?
If you encounter issues like poor adhesion or fading, check the pressing time, temperature, and pressure settings. Ensure the heat press is well-maintained and calibrated. If problems persist, consult the manufacturer’s instructions or seek professional assistance.
By considering these factors and addressing common concerns, you can confidently determine the optimal heat pressing time for your projects, ensuring high-quality and long-lasting results.
Transition to the Next Article Section: Selecting the Right Heat Transfer Paper
Conclusion
Determining the appropriate heat pressing time for a shirt is a crucial step in the heat transfer process, influencing the quality and durability of the final product. By understanding the factors that affect pressing time, such as transfer paper type, fabric composition, desired adhesion level, and environmental conditions, individuals can achieve optimal results.
This article has explored the intricacies of heat pressing time, providing practical tips and addressing common FAQs to empower individuals with the knowledge and skills to make informed decisions. By carefully considering the factors discussed and following the recommended guidelines, individuals can confidently tackle heat pressing projects and create stunning custom shirts that will stand the test of time.
Youtube Video: